

Bokeh Photography Tutorial: 7 Ways to Get More Bokeh
Bokeh is visual eye candy, but it can be elusive. Here's how you can use an understanding of physics to cram the most bokeh in to your frame.
It's cinematic, Instagrammable, and it separates your work from the ocean of iPhone snaps on the Internet. Bokeh, the blobby out-of-focus area of a photograph, is a favorite visual trick of portrait photographers to help reinforce subject isolation and make their subject 'pop' from the background. Recently, bokeh has trended in more conceptual spaces like fashion, street, and product photography.
But achieving bokeh relies on several complex equations. In this article, we're going to take a look at the science behind bokeh – and run down the ideal camera, lens, and shooting techniques to give you the most bokeh for your buck.
Getting More Bokeh: What's The Best Camera and Lens for Maximum Bokeh?
1. Wider aperture
The first consideration on your quest for bokeh is the aperture value of your lens. The faster, wider, or shallower your aperture (and keep in mind that these terms all mean the same thing, referring to the smallest number your aperture can reach), the more bokeh you'll see. For example, a lens that can open up to f/1.8 will create more bokeh than an equivalent lens that only opens up to f/4.
Unfortunately, faster lenses are significantly more expensive. If bokeh is your priority, consider diving in to the world of manual focus or vintage lenses for wider apertures at much lower costs. When shooting razor-thin depths of field, a photographer is typically working at a slower pace with still or portrait subjects, so a lack of autofocus is usually less detrimental.
Something to keep in mind for the precise photographer is that the nature of your bokeh can change depending on your aperture. Some lenses have perfectly circular orbs of bokeh wide open, but become slightly hexagonal as you begin to close down your aperture. Some lenses create onion or donut shaped bokeh balls. Stranger still, a few vintage Soviet-era lenses (like the Helios 44-4 lens) have 'swirly' bokeh.
An example of the 'swirly bokeh' found in the Helios 44-4. Fuji X-Pro 2, Helios 44-4.
There's a lot of documentation available online for any lens you might be using, so feel free to read up and test your equipment yourself for your favorite shape of bokeh.
To make a long story short, just remember that low aperture = thinner depth of field = more bokeh.
2. Longer focal length
Mathematically, aperture is only half of the equation. In fact, your focal length could be even more important than your aperture. Here's why.
The relationship of depth of field and focal length is inversely proportional. At 12mm, a maximum aperture of f/2.8 isn't going to net much bokeh – if at all - because lenses with a shorter focal length have much larger depths of field.
However, that same aperture of f/2.8 at 200mm will capture an explosion of bokeh, because the long focal length has a razor-thin depth of field. In fact, you can sometimes achieve better subject isolation and bokeh at f/5.6 with a long lens than a with a wide angle at f/1.2.
If that sounds like word salad, just keep this rule of thumb in mind: higher focal length = thinner depth of field = more bokeh.
3. Sensor Size
The last piece of the technology puzzle has to do with the size of your sensor.
Not only does a larger sensor increase your ISO handling, image quality, and dynamic range, but it also reduces your overall depth of field (meaning more bokeh). This can be bad news for sport, wildlife, photojournalist, and street photographers who need to reliably nail focus in hectic situations. But if a photographer is looking for that dreamy, cinematic look, they'll want to invest in a larger sensor.
Because of the relationship between sensor and depth of field, smaller sensors – like the iPhone, 1-inch, or MFT – have trouble getting the same bokeh that an APC-S sensor or a full frame sensor can achieve. Here's a technical analysis of this concept.
As with your lenses, you'll have to invest more money if you want to increase your bokeh ability. Modern full frame cameras are usually hundreds of dollars more expensive than their APC-S or M43 counter parts.
For the thrifty photographer, there are a few affordable options in the full frame market. You can read out review on the best and cheapest full frame in 2018 here.
But if it's starting to seem like the best way to maximize bokeh is to spend a bunch of money, you'd sadly be right. Thankfully, it's not the only way.
Heavy bokeh is attainable even without all the ideal gear. The image below was shot using a Fuji X-Pro 1 – an APC-S sensor – and a Fuji 35mm f/1.4, not a particularly long focal length. Read on to find out how you can maximize bokeh with the gear you already have.
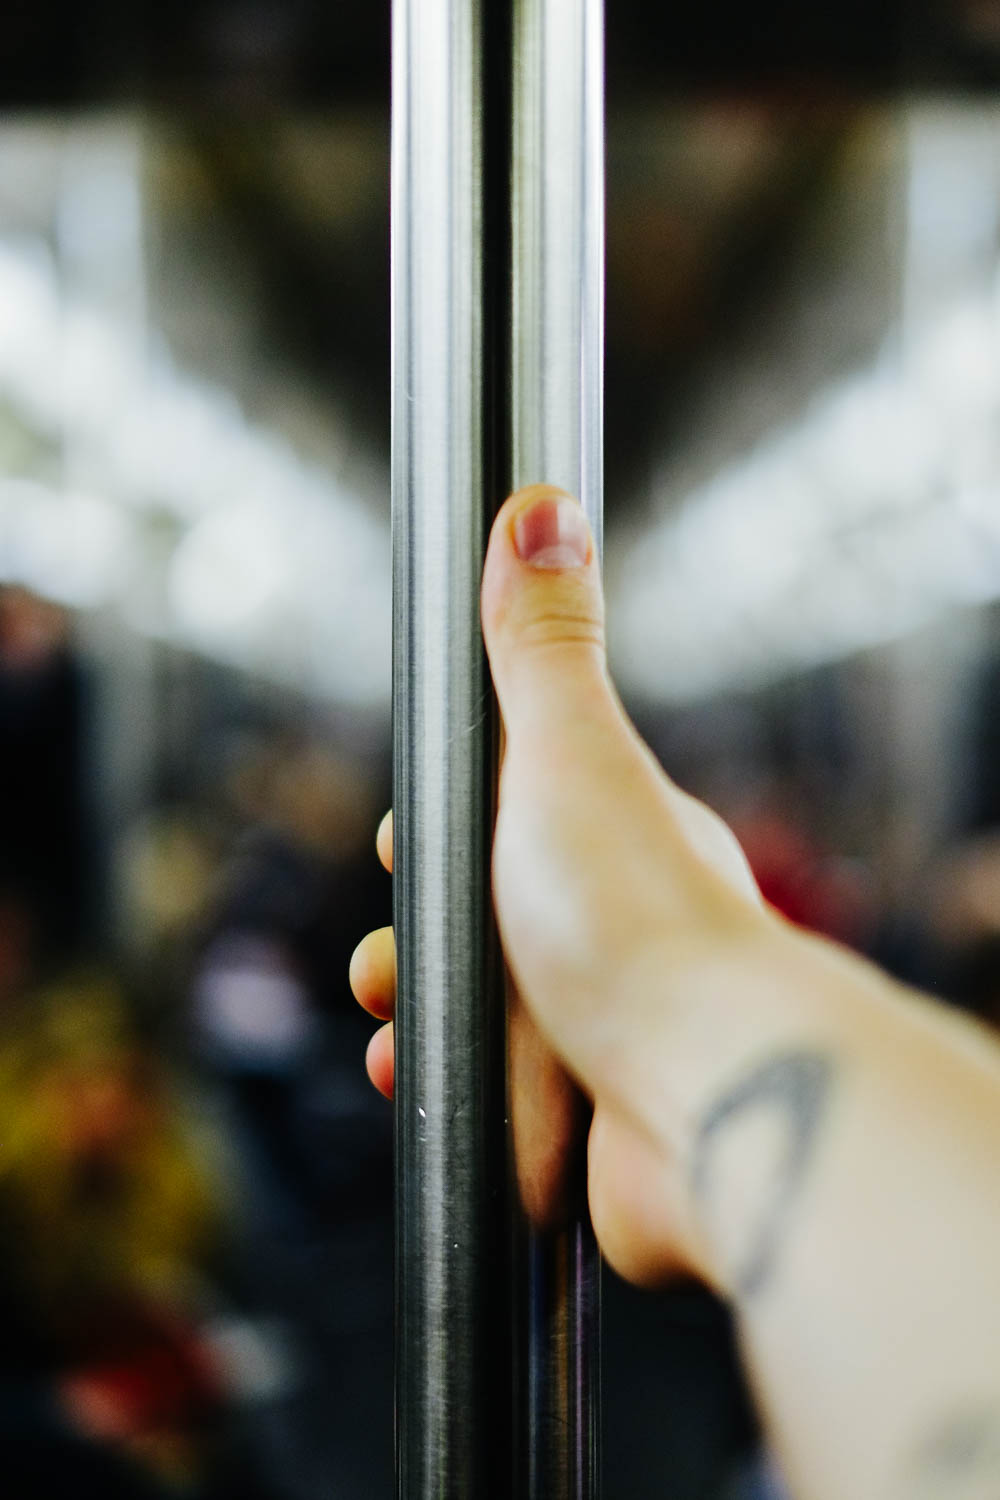
The 2 train in Manhattan. Fuji X-pro1, Fuji XF 35mm f/1.4.
How to Get More Bokeh (With the Camera and Lens You Already Have): Hacking the Camera Science Behind Bokeh
1. Camera distance from subject
Keep your friends close and your subjects closer. Not only does keeping your subject close to your lens increase image quality and decrease haze, but it also boosts subject isolation and bokeh.
You'll get the maximum possible amount of bokeh if your subject is at your lens' minimum focusing distance. Of course, unless you're shooting insects or legos, it's not usually realistic to 'macro focus' to such an extreme. Instead, consider it a rule of thumb: how close can you get your subject to your lens – without ruining your composition?
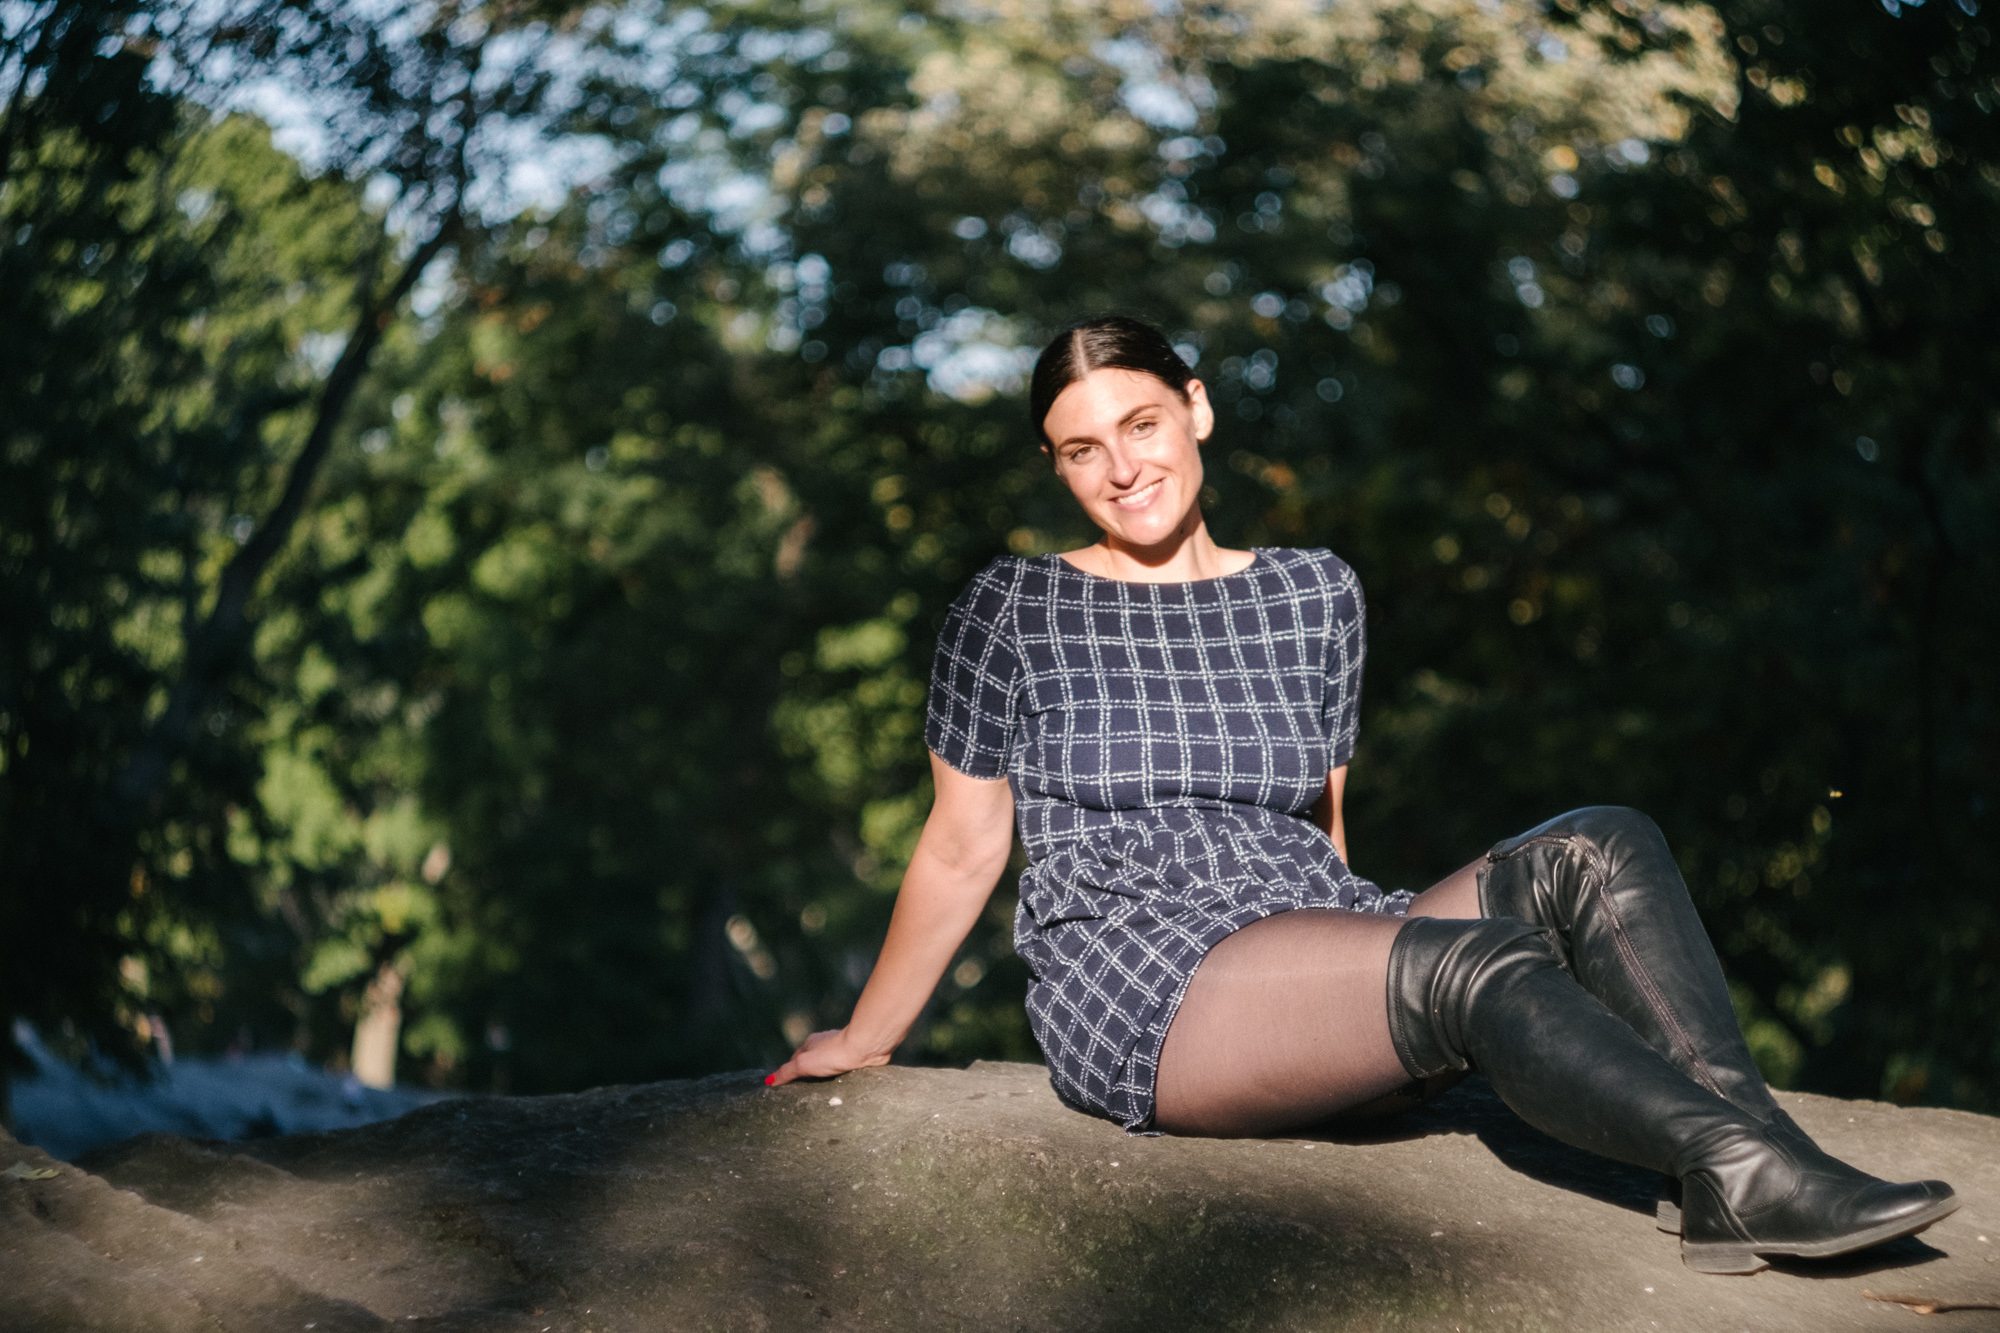
Catherine at the ocean. Fuji X-Pro 1, Fuji 35mm f/1.4.
This ratio of distance might be even more important than aperture, focal length, and sensor size. Try it yourself: take out your iPhone camera and focus on something extremely close to the lens. Notice what happens to the background? Yup, that's bokeh on a smartphone sensor!
2. Subject distance from background
On the same note, the distance between your subject and background is hugely important when it comes to increasing bokeh – only this time, the relationship is inversely proportional.
In other words, get your subject as far away from your background as possible!
Photographs don't have a sudden shift of in focus and out of focus. Bokeh needs distance to graduate out of focus and fall off in to smooth, creamy blur. The more distance you give it, the better the results you'll see – both in terms of bokeh smoothness and volume.
3. More light sources
Instagram-famous photographer Brandon Woelfel uses portable fairy lights to supplement his photos with a fantastical amount of bokeh balls. Brandon understands that additional light sources liven up photos, and his technique has become a well-known trademark.
If you don't have fairy lights, scan out your environment with a keen eye. Street lights, window lights, and neon signs can be used to kick up more bokeh in your shot. Sunlight filtering through treetops transforms in to hundreds of small lights, offering gorgeous and speckled bokeh.
But when we think of 'light sources', we shouldn't only think of things that generate their own light. Highly reflective elements like waves, grass, mirrors, glass, and metals can render as bokeh when the light refracts off of it and catches your lens. Even rain and snow can be sources of bokeh, as each individual rain drop or snow flake can create an orb of bokeh.

Snowstorm in Manhattan. Fuji X-Pro 1, Helios 44-4.
If all that weren't enough, you should also consider the distance of the light sources from your focal point. To increase the size of the bokeh balls, do your best to position the light sources extremely close or extremely far from your subject.
In the above shot, you can see large orbs of bokeh'd snow in the foreground as well as the background – but the snow that fell close to the focal point rendered as small and sharp flakes. The same principle will apply with any other light source or reflective element.
4. Brenizer Method
For now, we'll leave it up to famed wedding photographer Ryan Brenizer himself to explain how his technique can increase bokeh to impossible levels.
Check back soon for a complete tutorial on the Brenizer method!
If you want to put what you've learned to the test, check out this amazing free resource: the depth of field calculator. By playing with a few sliders, you can better understand the relationship between aperture, focal length, sensor size and subject distance.


