

How to Make Cinemagraphs: Your Guide to Ultra High Quality Gifs
High resolution masked .gifs – aka "cinemagraphs" – turn your video footage in to a moving painting, encouraging the viewer to absorb every detail of your composition – and focus only on the most important movement in the scene.
There's a reason why these .gifs so popular: viewers love them, and it gives a visual artist more creative control over how their video is presented. From a technical standpoint, a .gif is much more accessible than an embedded video. So how do you go about making one of your own?
Here's what you'll need:
- Video footage
- Adobe Premiere (optional)
- Adobe Photoshop
What Kind of Video Footage Can I Turn into a Cinemagraph .Gif?
As you've probably guessed, not every piece of footage can become a cinemagraph. You're looking for a scene with a gorgeous composition, localized movement, and above all, no camera shake.
Think about it – if your entire scene is moving, how are you going to mask out one specific bit of movement in your .gif? If you didn't shoot with a tripod and you're dying to turn your footage in to a cinemagraph, never fear: there's a way around it.
How To Make a Cinemagraph .Gif Loop Out of Shaky Video Footage
A necessary disclaimer: if your footage is significantly shaky – more than the normal vibration and movement from a handheld shot – there may not be any way to create a cinemagraph out of it. For those with relatively stable handheld footage, follow these steps.
- Import your footage in to Adobe Premiere.
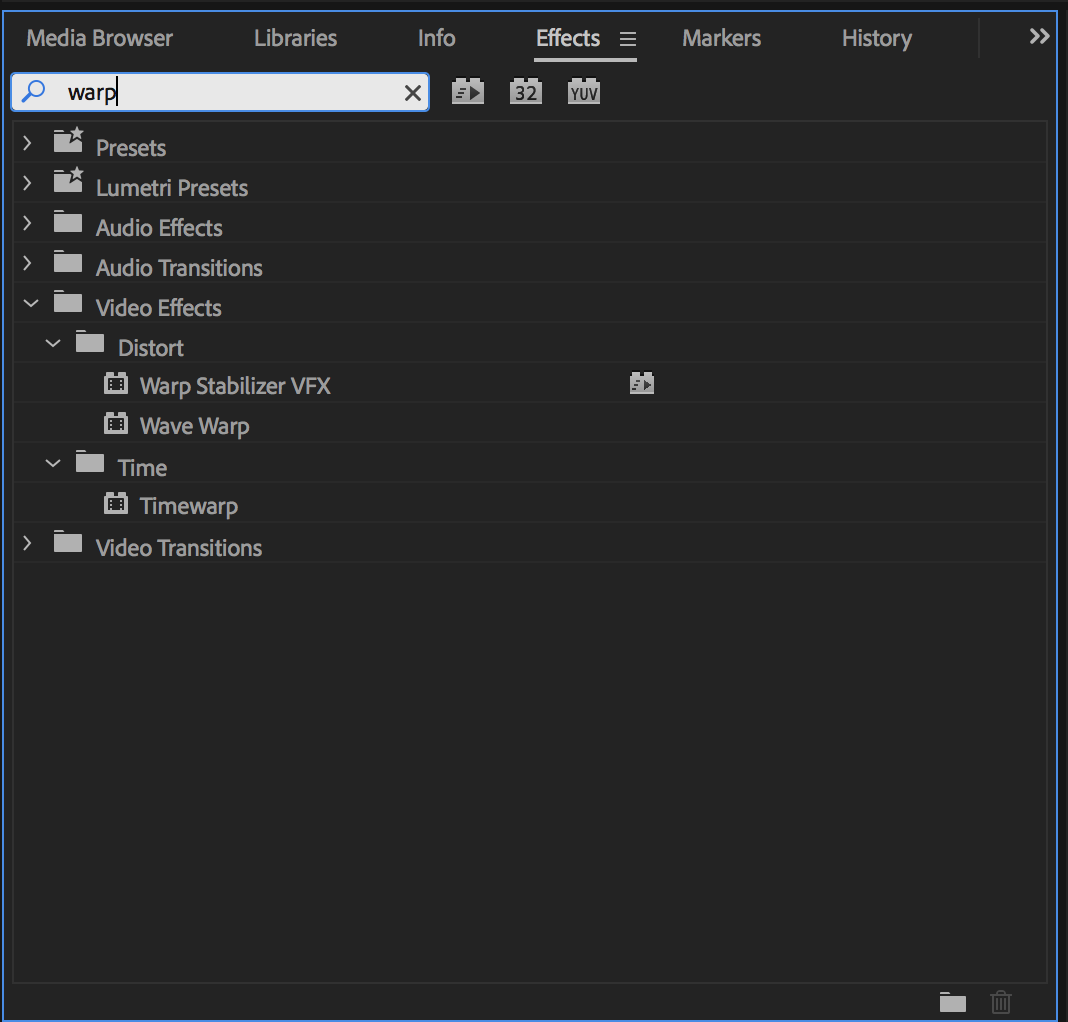
- Navigate to the Effects panel and search for 'warp'.
- Click and drag 'Warp Stabilizer VFX' on to your footage.
- Double click your footage and navigate to the Effect Controls panel.
- Change the Result to No Motion.
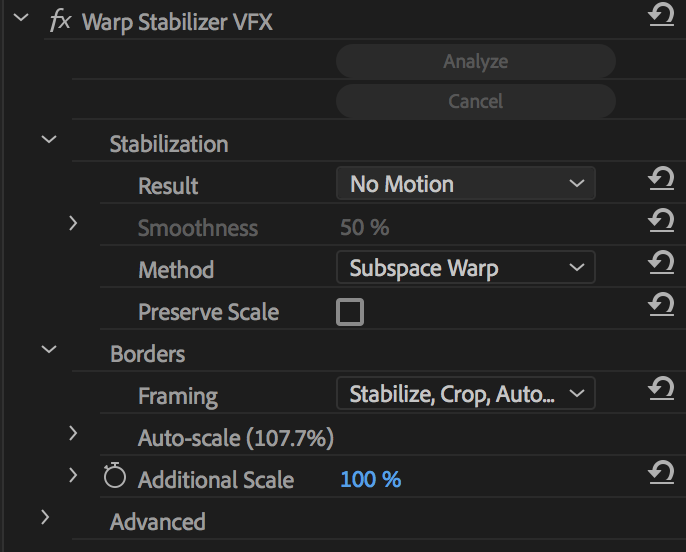
After the Analyze value hits 100%, you'll be able to play back your footage and see the result. Adobe Premiere crops in your footage to account for the stabilization, so if your movement is on the edge of the frame, you may need to re-crop – or select a different shot.
Protip: Hit "i" and "o" to select the in/out points of your final render to ensure you're getting the exact frames you want in your export.
Once you're happy with the outcome, export your footage (try to keep your frame rate at 24fps or below – otherwise, you'll end up with far too many frames in your gif and a ballooned file size!).
How to Make a Cinemagraph .Gif in Photoshop
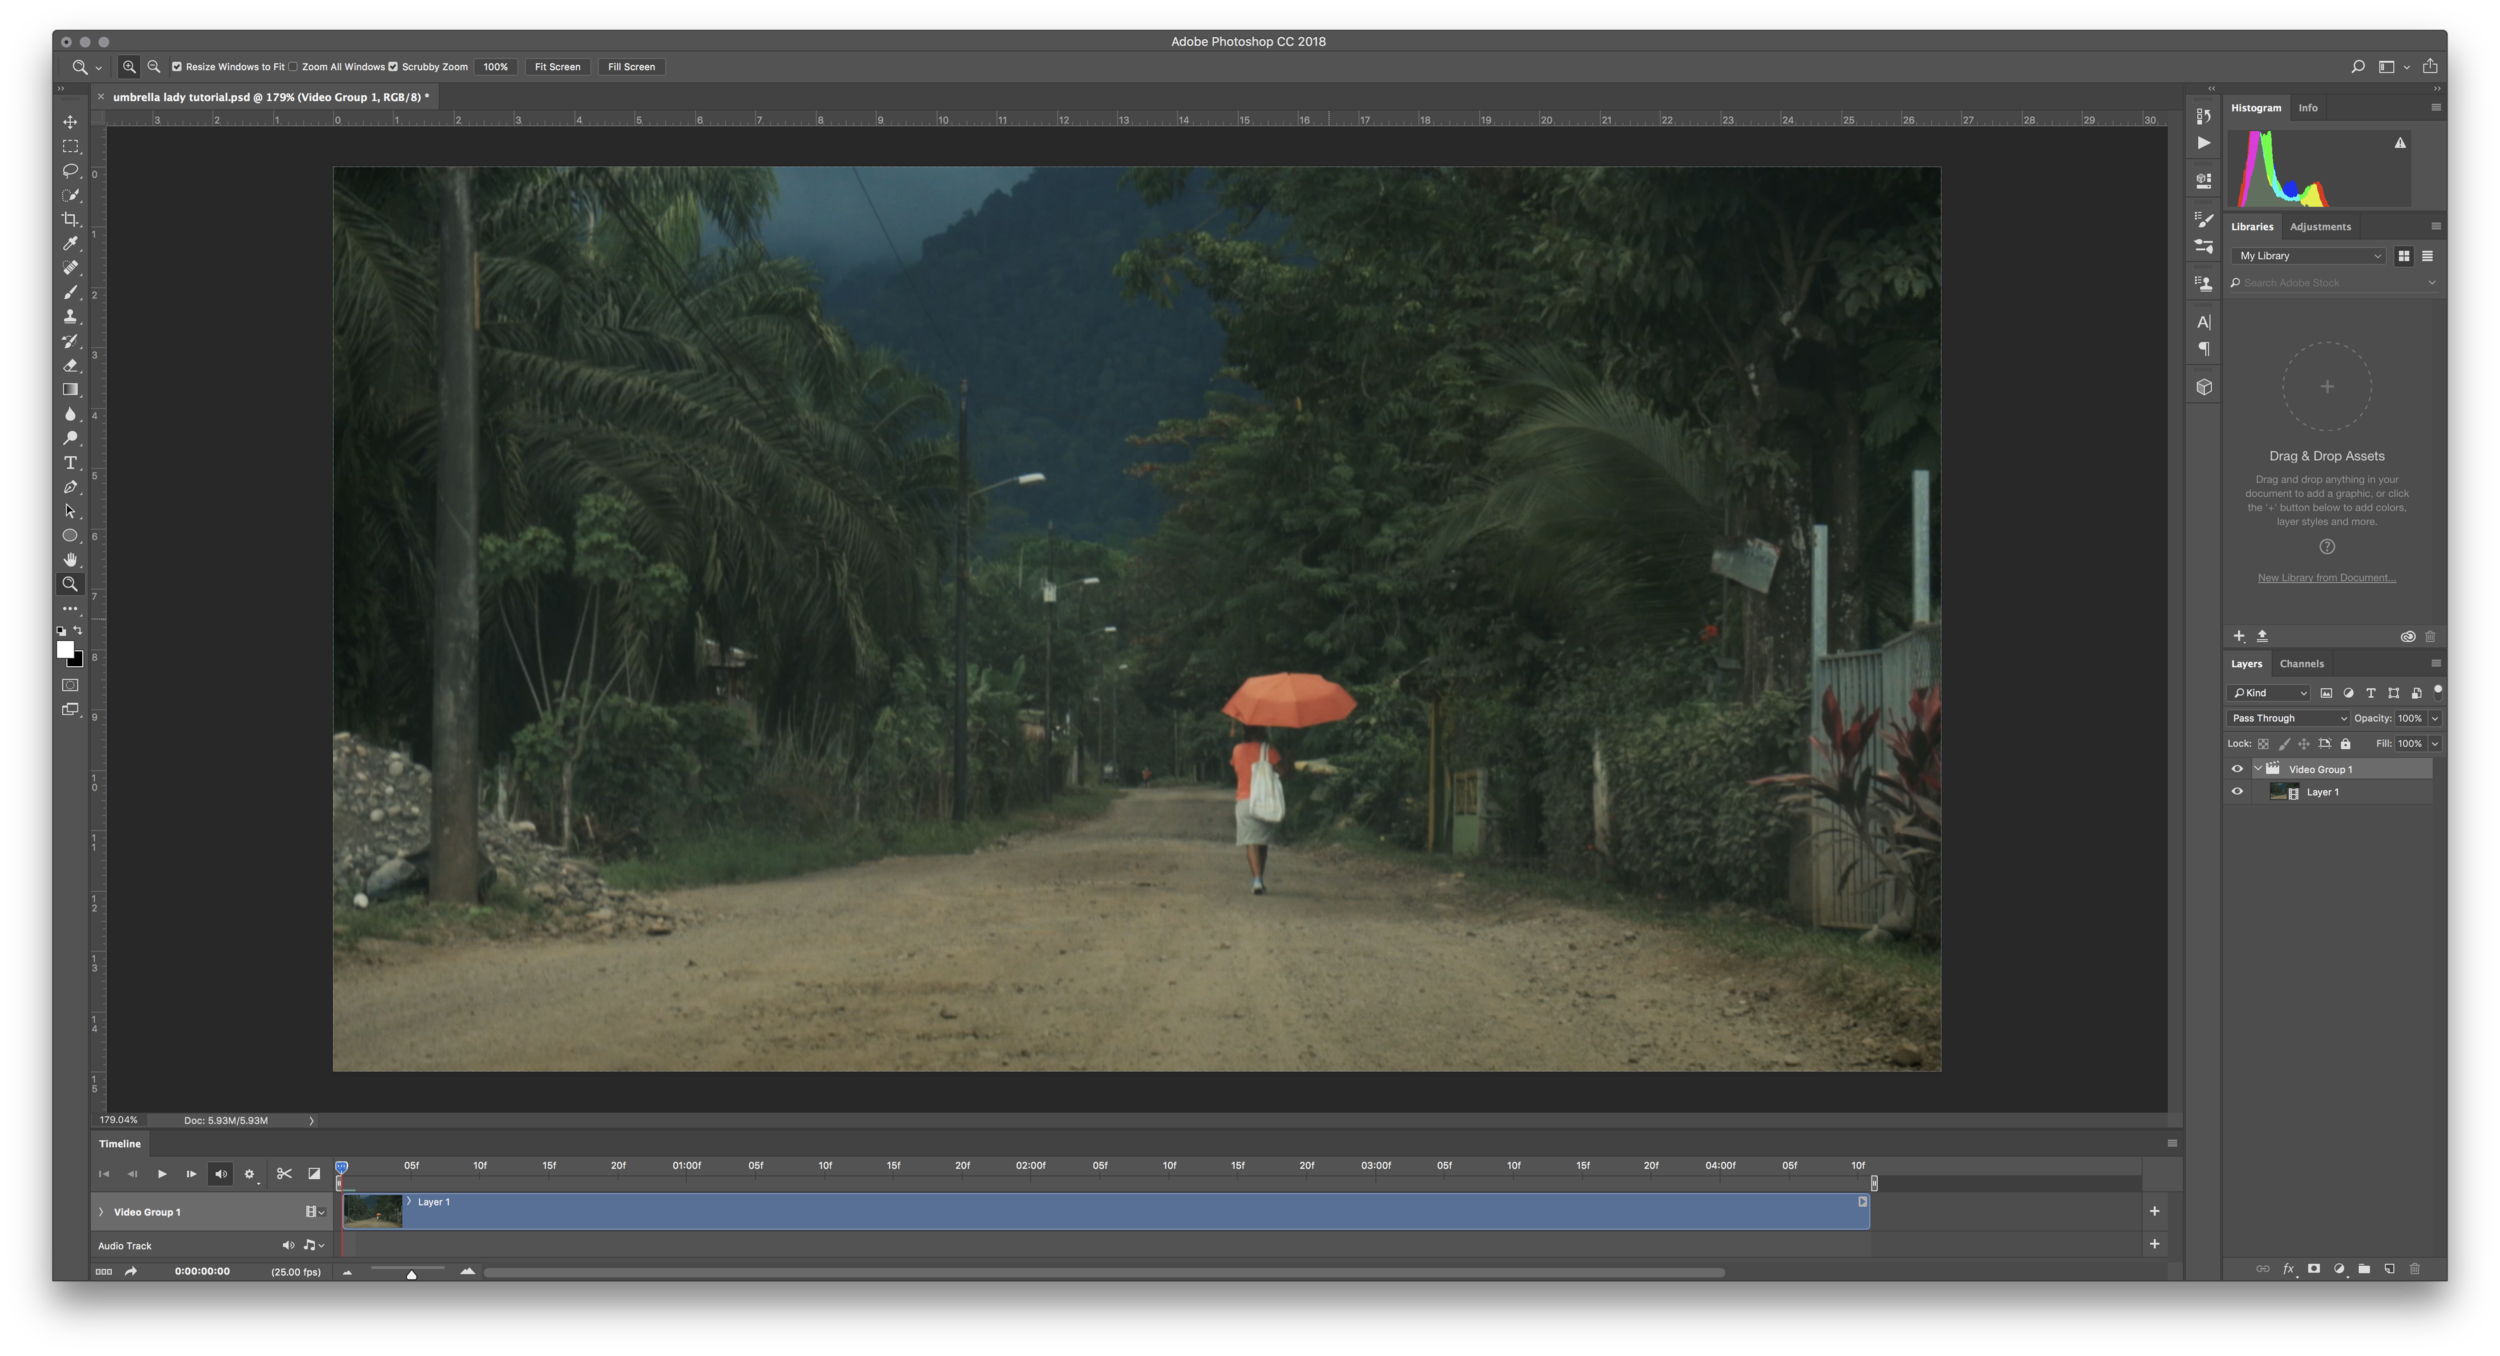
Now that you have your video file, open it up in Adobe Photoshop. You should be seeing something like this:
The first thing you'll need to do is duplicate the video layer, rasterize it, and move it out of the Video Group. Follow these steps closely:
- Select the video layer – likely called Layer 1 – and duplicate it by hitting Command+j or right-clicking and selecting Duplicate Layer....
- Right-click the new layer you've created and select 'Rasterize'. This will turn the video file in to an image file based off the first frame of the video. Feel free to rename this layer to 'Still Image' or anything that will help you remember what it is.
- Click and drag the rasterized layer to the top of the Layers panel, removing it from the Video Group and putting it on top of the Video Group folder.
- Finally, while the new layer is selected, add a mask by clicking the Add a Mask button at the bottom of the Layers panel.
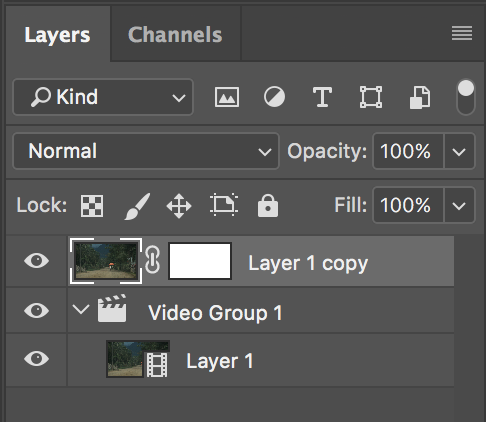
When you've completed the following steps, your layers should look like this:
One last housekeeping item: when you duplicated and rasterized that layer, Photoshop likely positioned the new layer above and after the video clip in the Timeline on the bottom of the screen. Simply scroll over to the right, grab your Layer 1 Copy (or Still Image – whatever you've named your layer), and ensure that it lines up with your video layer. It should look like the below:

If you're not sure why you just did those steps, think about it this way:
Your Timeline is a stack of objects. At the base of your Timeline, let's pretend you have an iPad – in reality, the video layer – that will play your entire scene.
On top of that iPad, you have a piece of cardboard paper – in reality, your still image layer. This piece of cardboard paper blocks the viewer from seeing the animation below, right?
If you wanted to look at the animation on the iPad, you'd just remove the cardboard paper. But if you wanted to display only a portion of the animation on the iPad, you could take a pair of scissors and cut out the area on the screen where that part of the animation occurs.
Back to the software...
If you scroll through your Timeline by dragging the blue knob on top of the layers to the left, you'll notice that there's no animation. That's because the still image is on top of the video layer, blocking all of the animation that's playing below.
Now, we'll cut out the areas that need to 'peek through' the still image layer to display your desired animation – using Photoshop's masks.
How to Mask Out the Animation in Your Cinemagraph .Gif
Ensure that you've added a mask to your still image layer - it should display a horizontal white rectangle. Reduce the opacity of your still image layer by ~40% (simply select your still image layer, click the percentage value next to the Opacity adjustment in the Layers panel, and click and drag or input a numerical value).
Now, cycle through your Timeline. You'll notice 'ghosting' wherever there's motion. These blurry areas are precisely where we want to mask out the still image layer.

Scroll through your entire timeline to understand how much of the area you'll need to mask. The professional visual artists take this step very seriously – increasing contrast or saturation on the still image layer to make the differences easier to see, adjusting the size and feathering of their brush, and zooming in to a pixel level – to avoid over-masking their cinemagraph gif.
Here's why: the more area you mask out, the larger your file size will be. That will eventually come back to bite you, as you'll have to sacrifice resolution or color values in order to post it anywhere. Moral of the story? Take the following step very slowly.
Select the Brush tool (simply hit the 'b' key while using Photoshop) and change your paint color to Black. Ensure your Mask is selected, not your image layer – it should look like this (note the selection being around the white mask, not the image thumbnail):

Starting at the first section of your Timeline, use your Brush to paint along the areas where your subject begins to 'ghost' or get blurry. Be sure to paint only where the movement is occurring. The end goal is to Mask out your top layer using the Brush tool with Black paint until every part of your desired animation is sharp and clear.
Pro-tip: If you end up painting too much, you can clean up your Mask by changing your paint color to White and brushing over the areas you'd like to remain static.
Slowly scroll through your Timeline, making incremental progress. Whenever you notice your subject getting clipped or ghostly like in the below screenshot, be sure to mask those areas in. It's best practice to zoom in real close and slowly drag your cursor through the Timeline, keeping an eye out for anything – blades of grass, hairs, birds, drops of water, and more – that will interfere with a clean cinemagraph if not properly masked in.

When you think you're done, turn the opacity on your still image layer back up to 100% and allow the animation to play through. At this point, you'll know if your cinemagraph will look nice or not. Congratulations!
Finishing Touches and Exporting the Cinemagraph Gif in Photoshop
Technically, the hard part is over. But if you've taken great care to color grade your footage exactly how you'd like it, this part can be painful.
Now that your cinemagraph gif is masked and you've created the animation effect, it's best practice to slightly lower the dynamic range – thus, the color values – of the scene. The less different colors you end up having in your composition, the smaller your final file will be.
A quick and easy way to do this is with an 'S-Curve'. Create a new Adjustment Layer and select Curves.

Adjust the Curve to lower the Black values and increase the White values by selecting points on the Curve and dragging them up or down, similar to the below:

This will effectively punch up the contrast in your image, reducing the overall dynamic range without ruining your colors. If you're dealing with sensitive colors like skin tones, play around with your S Curve to ensure a satisfactory color integrity.
When you've created a result with lower dynamic range that still looks good to your eye, it's time to export your cinemagraph gif. Navigate to File > Export > Save for Web (Legacy).

This looks scary, but we're going to take it simple for this tutorial. First, ensure your file type is GIF (if it's JPG or PNG, simply click the down arrow and select GIF). You'll want to resize your cinemagraph gif using the Image Size fields – note that you'll rarely need anything wider than 1000px.
Next, select Looping Options: Forever under the Animation label. Otherwise, your cinemagraph gif will loop only once, and then stay static until the viewer refreshes.
Take a look at the bottom left corner. If your file size is above 20MB, you're going to want to either resize your image, re-mask it more carefully, intensify your S Curve, or do all 3. If you're below 20MB, you can use the sliders and check boxes to get to an appropriate file size.
Looking for a benchmark? For sharing on sites like Twitter and Tumblr, it's important not to exceed 5MB.
This part comes down to your eye, but a general way to decrease file size is to lower the amount of Color, decrease your Dithering, increase your Lossy value. Be sure to strike a balance between image quality and file size. When you're happy with your result, hit Save.
And here's the finished result, under 1MB!
Woman in Quepos, Costa Rica. Shot with BMPCC, graded in DaVinci Resolve.
Here's another example.
River in Quepos, Costa Rica. Shot with BMPCC, graded in DaVinci Resolve.
The below cinemagraph gif clocks in at 1Mb – isolated movement is your best friend when it comes to cinemagraph gifs. You'll notice some color banding in the sky, which could have been reduced with a better Color Reduction Algorithm.

Biker in Quepos, Costa Rica. Shot with BMPCC, graded in DaVinci Resolve.
However, there are sometimes so many frames and such a wealth of color values in a scene that it's almost impossible to create a cinemagraph gif with a reasonable file size.
In the below gif, I had to delete half the frames, downsize it to 500px, reduce the Color to 128, increase the Lossy value, and we're still left with a file that's almost 5MB. It's not terrible, but for my tastes, it's a bit too muddy and jittery.

Cow in Jacó, Costa Rica. Shot with BMPCC, graded in DaVinci Resolve
Now, there are certainly ways to make any kind of footage work in a cinemagraph gif – the intricacies of the gif optimization panel are endless – but we'll save that for another post.
If you found this tutorial helpful, please drop a link to your creation in the comments below. If you have any questions, don't hesitate to reach out!
